First things first, you have to make sure that your axles can accept a brake assembly. Luckily both of my axles had the brake flanges (a flat piece of steel with 4 holes in it, located just behind the actual spindle/hub assembly). To my knowledge, all brake flanges are the same size, and have the holes in the exact same place, so there is no need to worry about buying the correct brake drum assembly when considering the brake flange bolt pattern. There is, however, a good deal that goes into buying the brake assemblies that will fit your wheels and trailer weight. I have 3500# axles on my toon triler x2, so I knew that 3500# brake assemblies would work. That gave me the strength I needed. Then, I knew that my trailer had 13" tires, so I had a choice between 7" or 10" brakes. When it comes to stopping, I want the most dependable, biggest brakes I can get, so I opted for the 10" assemblies here. I purchased a set (left and right because it makes a difference) at $40 per wheel.
Once I had decided on the drum brake assemblies, then I needed the drums. This is probably the single most expensive part of the mechanical side of the brakes. When I purchased the drums, I had to make sure that the bolt pattern was the same as my hubs, so I wouldn't need to buy new wheels/tires. My trailer wheels are 5 on 4.5" bolt pattern, so I found 10" brake drums, with a 5x4.5" bolt pattern, that came complete with new bearings and caps for about $82 each. With the brake backing plates, and the drums, I was ready to go as far as the mechanical side of the brakes was concerned.
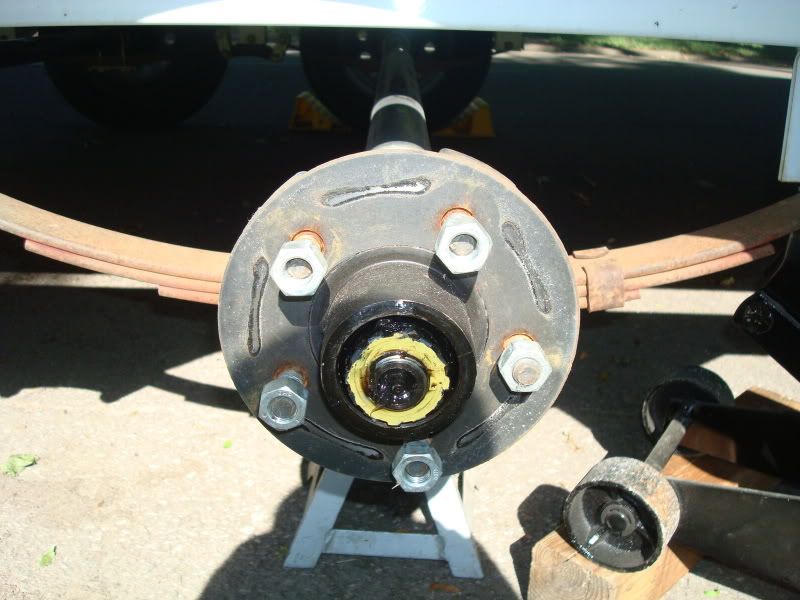
I removed the wheels on the trailer, and then removed the grease cap on my hub. Be careful here not to damage your cap, as you may want to re-use yours. I choose to re-use mine, as I felt they were superior to the ones that came with my new drum/hub assemblies.
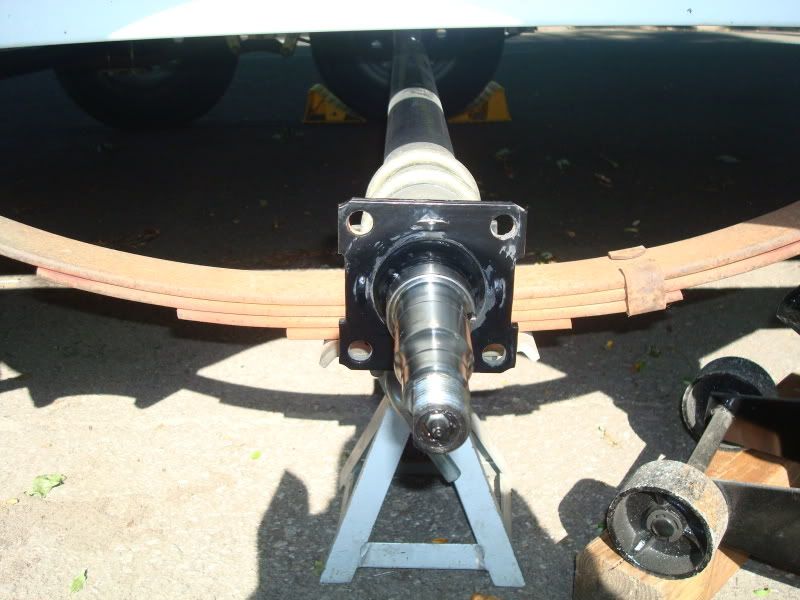
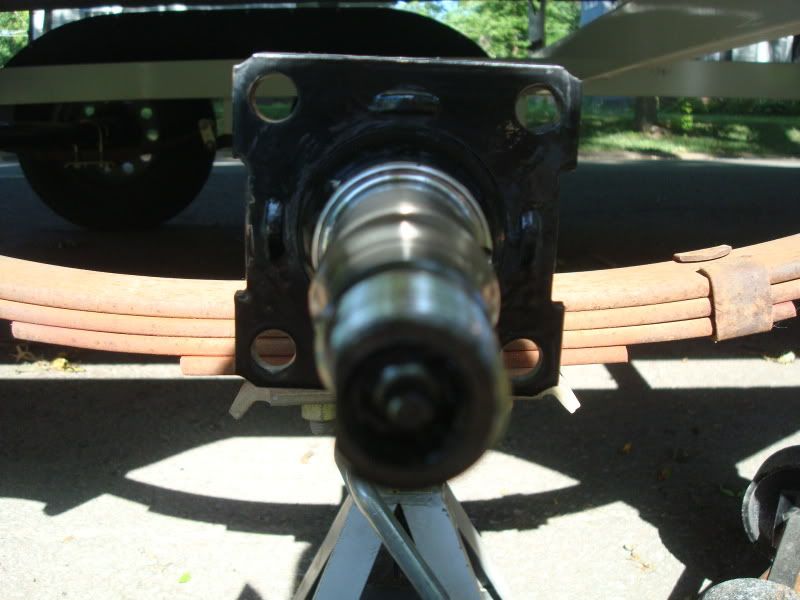
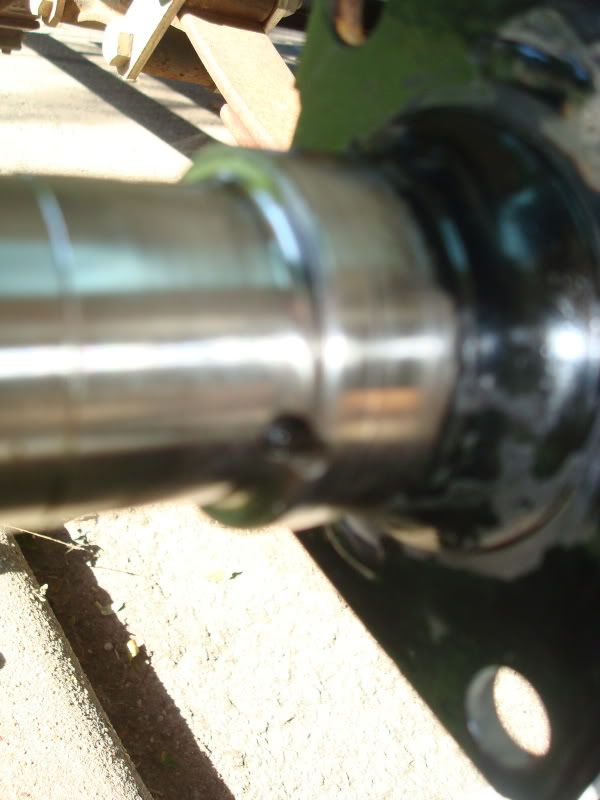
Once the old hub was off, it was time to clean and inspect the spindles. My spindles, as I suspected, looked excellent, so after a good cleaning, I was able to bolt on the brake assemblies. You can see in the last picture of the spindle that there is a little hole where the grease comes out when you grease your spindles. I made sure there were no obstructions in this, and continued on to the brake backing plate installation. A note here that the brake assemblies did NOT come with the hardware to bolt them to the brake plate on the axles. I had to stop in the middle of the job to go get bolts, lock nuts (with the vinyl insert) and lock washers to bolt the brake assembly to the plate on the axle.
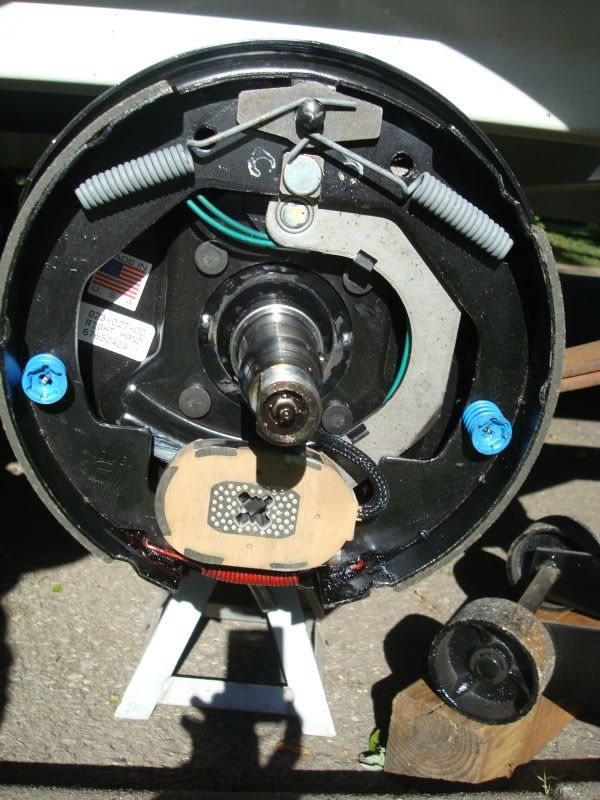
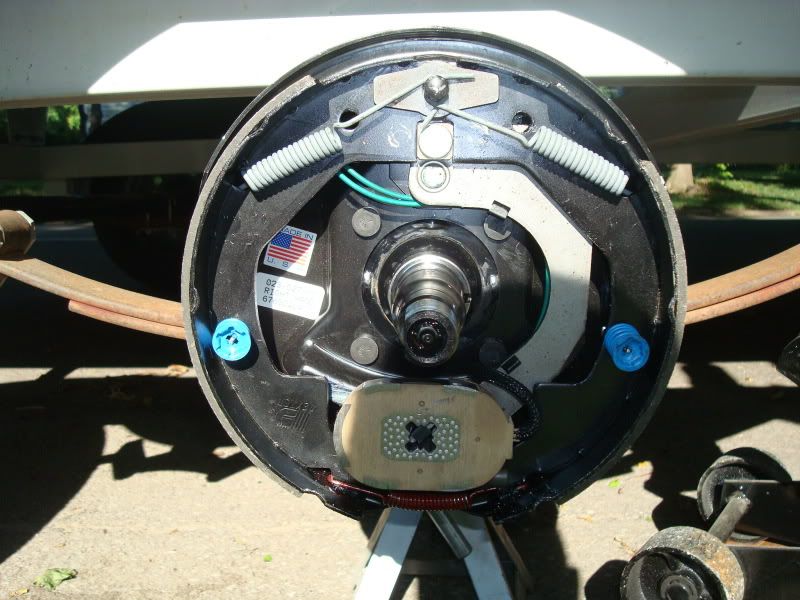
Notice here that there is a Left, and a Right side brake assembly. You always want the magnet (yellowish box) down, and the metal arm (silver part) to the front of the trailer. This will ensure correct adjustment of the shoes, and that they work the way they should.
Once the Backing plates are installed, it was time to get the hubs ready. Even though I knew my wheel bearings were in great shape, I choose to use the new bearings that came with the hub/drum assemblies instead, just to ensure 100% correct fitment. I packed the new wheel bearings the old fashioned way, by hand, with a good quality marine grade grease. This didn’t take too long, considering there were only 4 bearings that needed to be packed, and that I didn’t have to clean out the bearings first, since they were new. Once I had the bearings packed, I put a good sized glob of grease in the hub/drum assembly too, where the bearings will go. You don’t want to fill this up, but put a descent amount in so that you don’t have to pump this full of grease later when you get the hubs back on. Next install the rear or inner bearing and install the seal. I used a wood block and rubber hammer here to install the seal so that it stayed flat the entire time, and that it went in slowly with no dents or damage. Then I greased the spindle by hand, and slid on the new hub/brake drum assembly. Once that is on, you slide the front or outer bearing on, along with your retaining washer then the spindle nut. I was told to tighten the spindle nut finger tight, then another quarter turn while still ensuring that the hub/drum assembly spun freely. Then install your spindle nut retainer or cotter pin. It’s important to note here that my axles didn’t have a cotter pin style retainer for the spindle nut, but instead used a flat sided retainer that can be re-used. If your style of spindle has a cotter pin, it should be replaced, and NOT re-used.
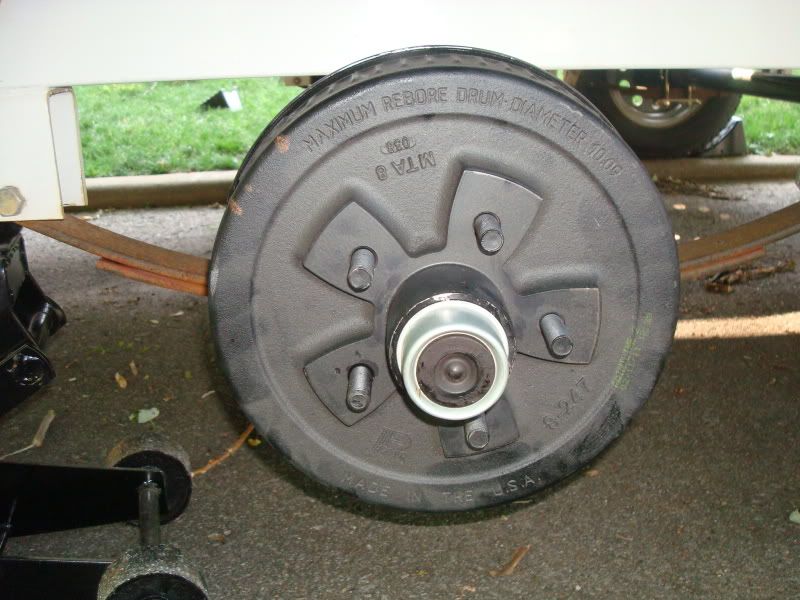
Once the assembly is installed and spinning freely, it would be wise to squirt some grease in now. I squirted another 6 or so pumps of grease in the hub, then re-installed my hub cap. Notice my hub caps have a nice little rubber insert that I can remove easily to grease the hub, without taking off the entire hub cap. Once you are confident that there is enough grease in the hub assembly, put the wheel back on, and you’re ready to go, mechanically anyways. (Important to note that the first trip I took, I went about 2 miles or so, and felt my hubs to ensure they were not scorching hot from lack of grease. The front hubs where I installed the brakes felt exactly like the rear hubs, where there were no brakes, so I figured I had them greased enough for now. Once I arrived at the lake about 20 miles away, I went ahead and put another 4 squirts of grease in the hubs again to ensure they had enough grease)
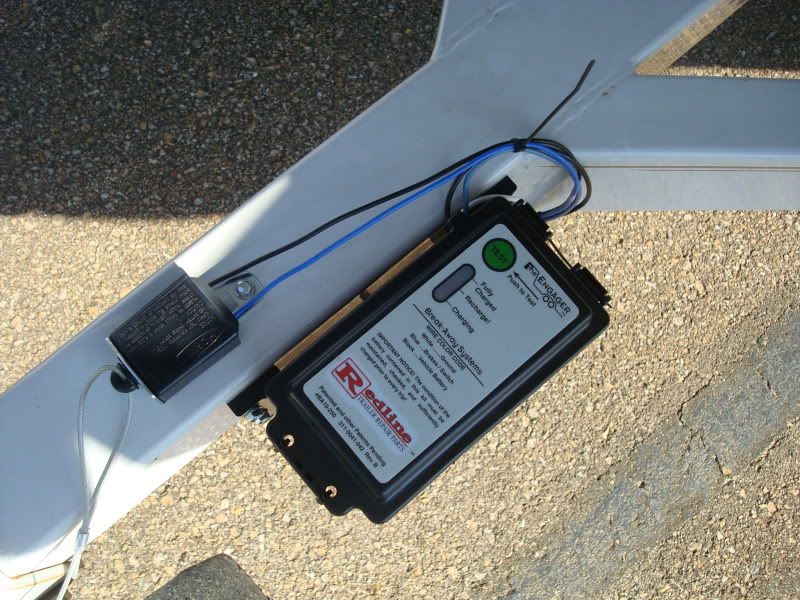
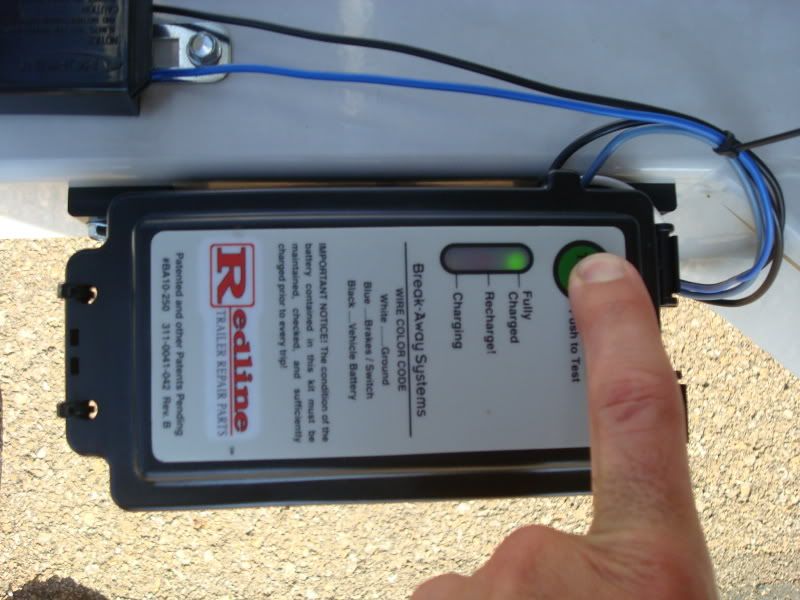
Now I was ready to tackle the electrical side of the brakes. It is now a Kansas Law (and probably every other state as well) that if you have electric trailer brakes, you MUST have a break-away safety kit that will activate the electric brakes on the trailer if it were to ever be separated from the truck while being towed. This extra piece of equipment was the most expensive single piece, but it is required by law to have, if you have brakes. I purchased my break-away kit for $95 which came with the battery, battery box, break away switch, and on-board charger and indicator light. The entire thing comes in a box about the size of an ATV battery, that you mount somewhere on the tongue of the trailer. Once I had this mounted where I wanted, it was time to run some wires.
On the actual brake assemblies, there are 2 wires coming from the back. These were both green on my kits, and I didn’t feel the need to take a picture, as it doesn’t matter which way the wires are connected. I ran a white wire (ground) from one brake assembly to the other brake assembly and connected it to 1 of the wires on each assembly. Then take another white wire that goes to the front of the trailer, and connect it to both white wires for each brake assembly. You should have one wire, going to a butt connector, with two white wires coming out the other side of the butt connector, one to each brake assembly. Then I took the other wire on the brake assemblies and connected them together with a black wire (power/brake). These two wires should be ran the same way as the whites, in that both brake assemblies should go to one side of a connector, then a single black wire coming out the other side of the connector. On each of these joints of wires, I used 14 gauge butt connectors with electrical silicone slathered on them, then heat shrink tubing around the connectors, then electrical tape around the heat shrink. The last thing I wanted was a bad connection or water intrusion here where the wires will get submerged every time I use the boat. I ran the single white wire, along with the single black wire up to the front of my trailer through the frame rail. For this, I simply drilled a ½ hole in the frame, and installed a rubber grommet in the hole to prevent it from fraying my wires. My frame was hollow, and I could see where the wires for the tail lights were already run, so I knew I could use this same method for running my brake wires. I simply used a fish tape to get the wires from the back of the trailer to the tongue.
So far so simple right? Well here is where the tricky part comes in. Now you have to tie in all of your current wires for the lights etc to the new wires that you just ran for the brakes and for the break-away kit, all to a 7-way RV plug. My first step was to make sure I knew which of my 4 wires from my current trailer wiring plug did what. After marking them down, I cut the end off of them, so there was no longer a 4-way plug. Next, I took the single white wire that I ran up the trailer from the brakes and matched it to the white wire from my 4-way plug. This is a ground wire, and it is important that you have a good ground for your brakes, break-away kit, and lights. I used the ground wire for my lights that was already there and just made sure it was still sufficient for the lights portion. I then left it alone. Next I had to create a ground for my brakes and break-away kit. I simply took a 5/16 self tapping bolt, and drilled it through the frame. With this bolt, I had a 12 gauge eyelet that had both of my 14 gauge white wires from the brakes, and the brake-away kit installed into it. This created a sufficient ground for my break-away kit (battery box) and the electric brake assemblies.
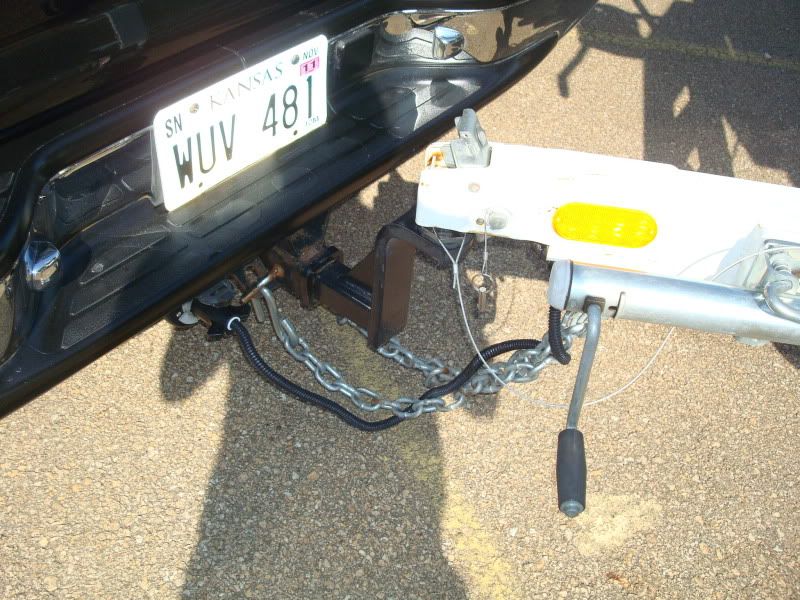
From there I had to run my constant power to the break-away kit (battery box) from the vehicle. Obviously one side of this wire will go from the 7-way RV plug, and the other will go to your power for the break-away kit. This will ensure that whenever the 7-way plug is plugged into the towing vehicle, then you will be charging the battery for the break-away kit, in-case the trailer falls off. Next I wired in the actual switch that tells the kit to engage the brakes if the trailer becomes disconnected from the truck. I won’t go into how to wire this, as all of them come with easy to follow instructions. I will say though that you need to pick a good place to mount the switch assembly to your trailer tongue so that there is a straight, clear, un-obstructed path between the switch and the connection point on the vehicle. My switch came with a wire that connects the switch pin to a loop in the wire that I simply loop around the 2†ball before I connect the trailer to the truck. This way if the trailer comes off the truck, it will pull the switch, and engage the brakes. I made sure to make the switch cable slightly shorter than my safety chains so that if the trailer comes disconnected, it will pull the switch and hit the brakes on the trailer before I bottom out my safety chains. I hope that by doing it this way, if this ever happens, it will prevent the trailer from doing major damage to my truck because it will be braking before I do, and will keep the trailer away from my truck, and not bouncing off of it to stop.
After I connected all the new brake wires (2) with the current trailer light wiring wires (4) I was ready to wire in my new 7-way RV connector. All of these come with clear instructions again, so I won’t go into how I wired them up. The last thing I had to do was install the brake controller to my truck. I chose to go with the Kelsey Hayes Energize III controller since I could get it at a descent price, and I knew they were relatively easy to adjust. I paid $85 for the controller, and $15 for the pigtail to fit my Silverado. I still had one more problem to figure out though. I will sometimes tow my boat with our Traverse as well, and I want to be able to use the trailer brakes for the boat while pulling with the Traverse, but didn’t want to have to buy 2 brake controllers. So, I simply wired the brake controllers wiring pigtail to an empty female 4-way trailer wire connector. Then my Silverado pigtail and the Traverse pigtail are wired to an empty male 4-way trailer wire connector. This way I can mount my brake controller in my Silverado, or Traverse via the Velcro it came with, and simply plug in the 4-way connector under the dash to my vehicle’s pigtail, like you would a normal trailer. This allows me to transfer my brake controller from one vehicle to the next with ease.
After having all of this done, it was time to test the brakes and make sure I did everything correctly, and that they actually worked. To my surprise, the brakes felt like they weren’t even working at first. Sure, I could feel them, but it wouldn’t even stop my truck at idle speed while engaging the trailer brakes only, it would only slow my travel. Then I thought well, I need to adjust my controller more, but I was already maxed out on the controllers gain wheel. So I decided that since the trailer brakes were drum brakes, that maybe they needed some adjustment. So I took the trailer for a quick spin for about 3 miles, making frequent stops. That did it! Now the brakes were even locking up the tires on the trailer if I stopped hard, just like I wanted. After a 20 mile ride to the lake the next day, I had them adjusted perfectly, and I could feel the trailer helping me stop every time, without locking the trailer wheels, unless I slammed on the brakes.
All in all the project cost me right at $425 including the Spools of wire, Brake assemblies, Drum/hub assemblies, break-away kit, Brake controller, and wiring pigtail for my Silverado. Not bad at all, and if it saves me from one wreck, it will be worth every penny, as my deductible is $500. The time I spent total was probably about 6 hours, with 2 hours allocated to the actual brakes, and 4 hours of wiring for my truck, and the Trailer.