Winterization tutorial (I/O)

You know the drill..

Moderators: Redneck_Randy, badmoonrising, lakerunner

Message
Author
User avatar
badmoonrising
Site Admin
Posts: 10066
Joined: Fri Mar 30, 2007 7:04 pm
Location: Chesapeake City, Maryland

Winterization tutorial (I/O)

#1 Post by badmoonrising » Sat Nov 29, 2008 7:23 pm

1) To begin, I usually add Seafoam to the tank a few trips before we take the PC out of the water. If not done then, be sure to add stabilizer to the fuel and run the motor long enough so that the Seafoam gets into the carb.
Image

2) Hook up a suitable "boot" to your garden hose(turn on the water!). Start the motor and warm it up until the thermostat opens (I wait until the temerature guage reads 165).

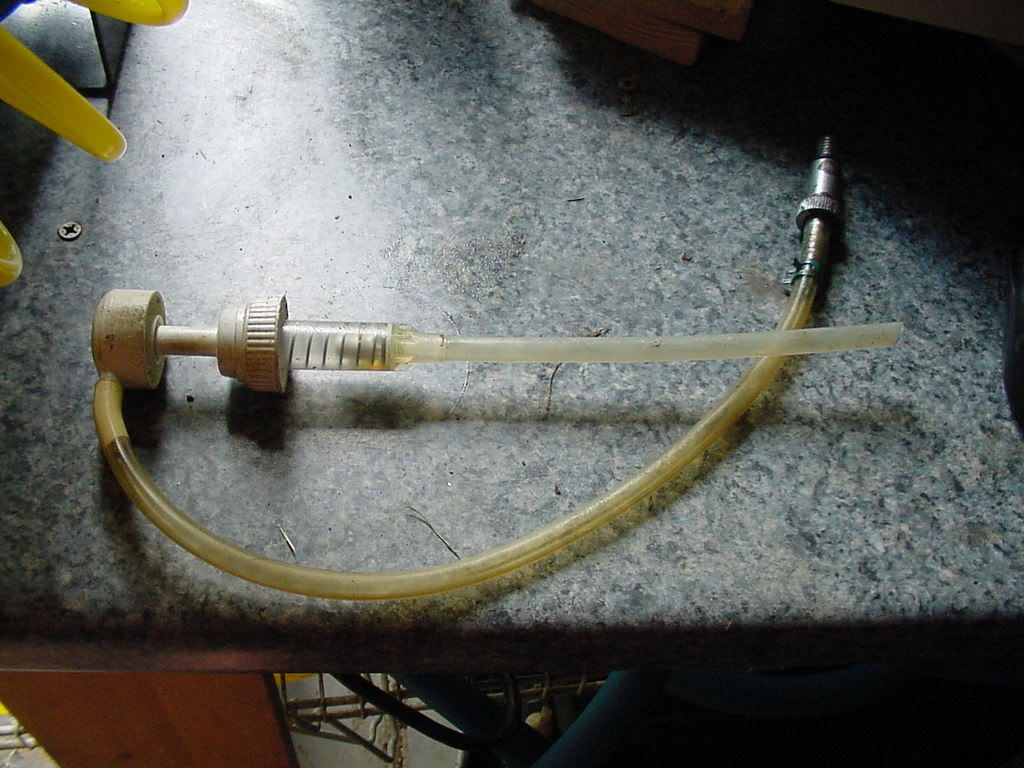
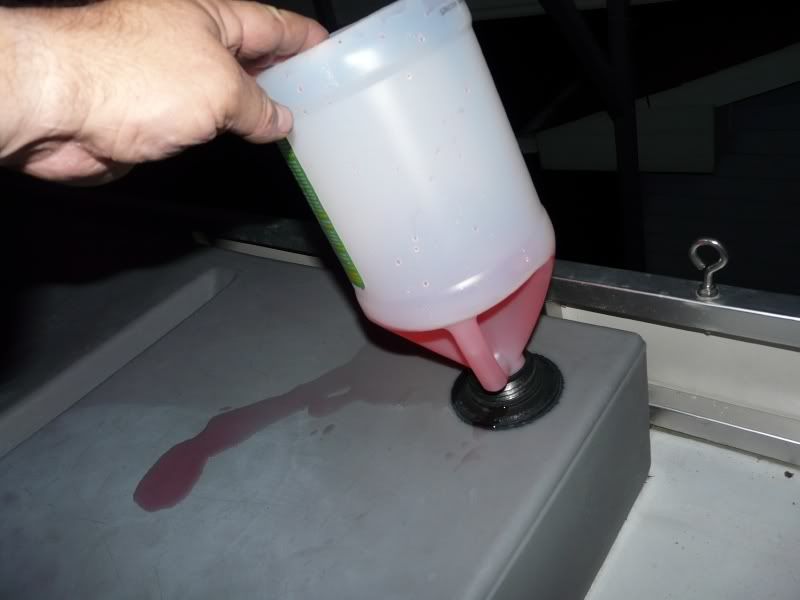
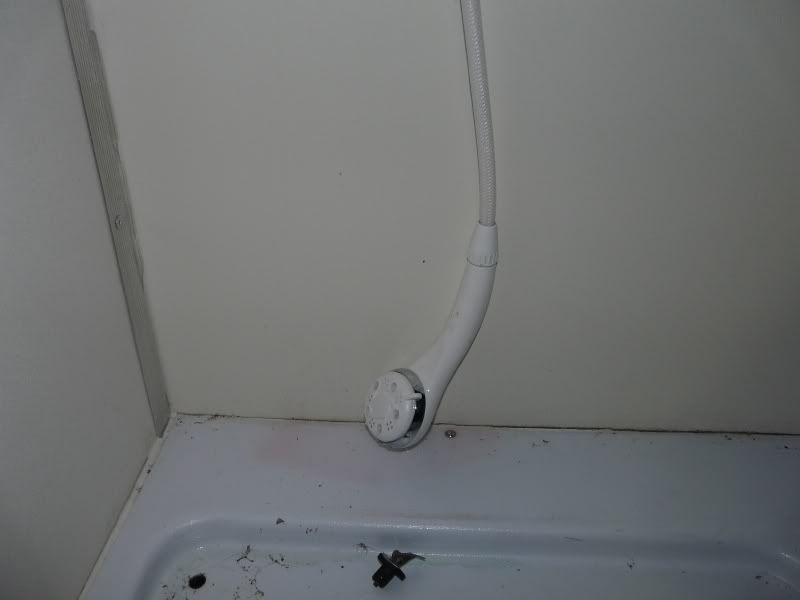
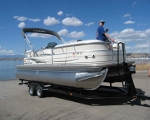
3) Remove the garden hose from the boot, and hook up the winterizing kit (tank, hose, fittings) as shown below. Elevate the tank so it's above the drive water pump. (Yeah the logs, drive, etc are dirty :puke 
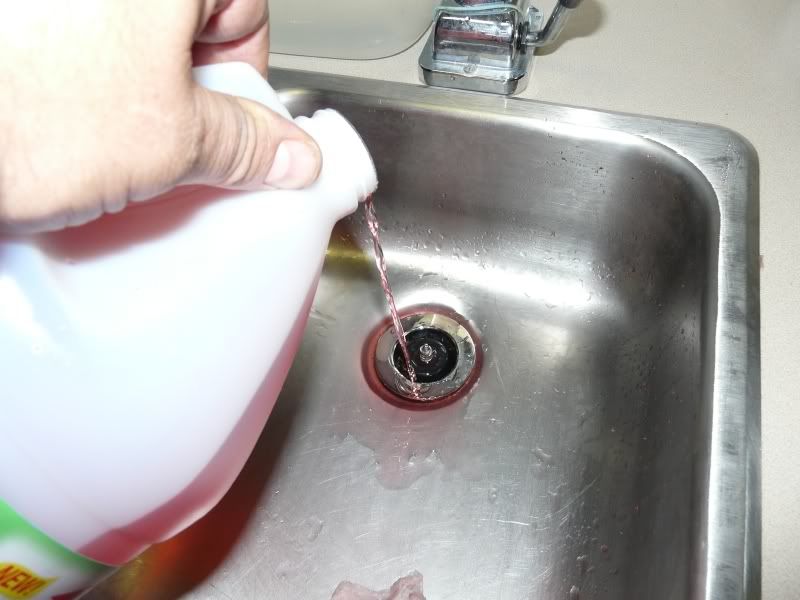
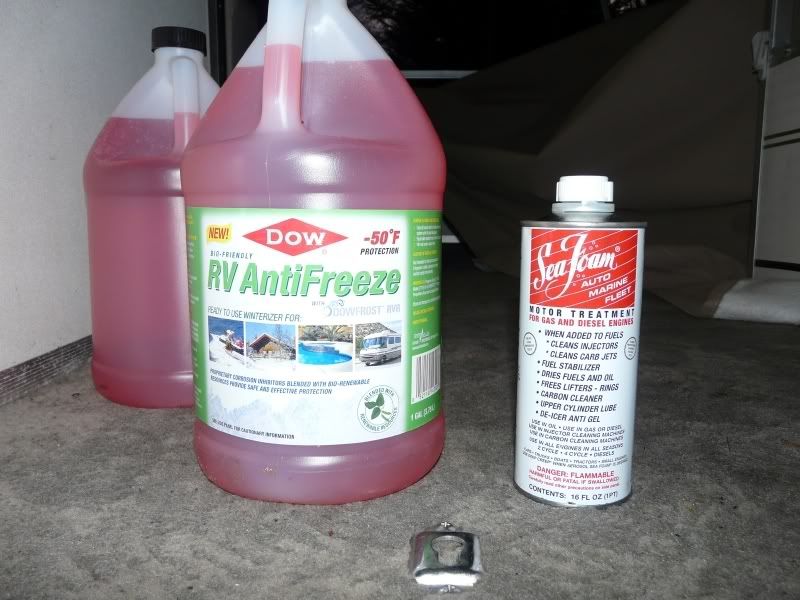
...just pulled it out of the water. I use 4 gallons of the pink RV/Marine antifreeze. Run the motor until you see the pink antifreeze coming out of the exhaust ports. Leave about a gallon in the tank.

Image
Image

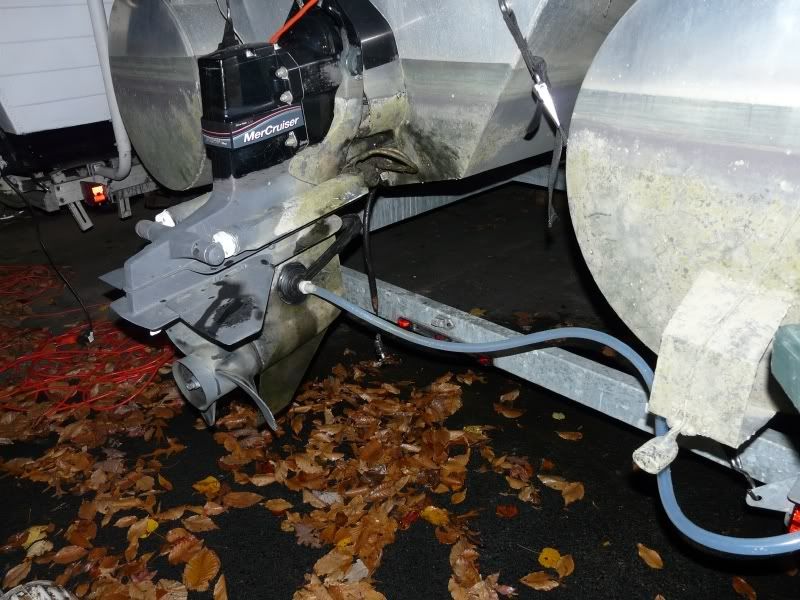
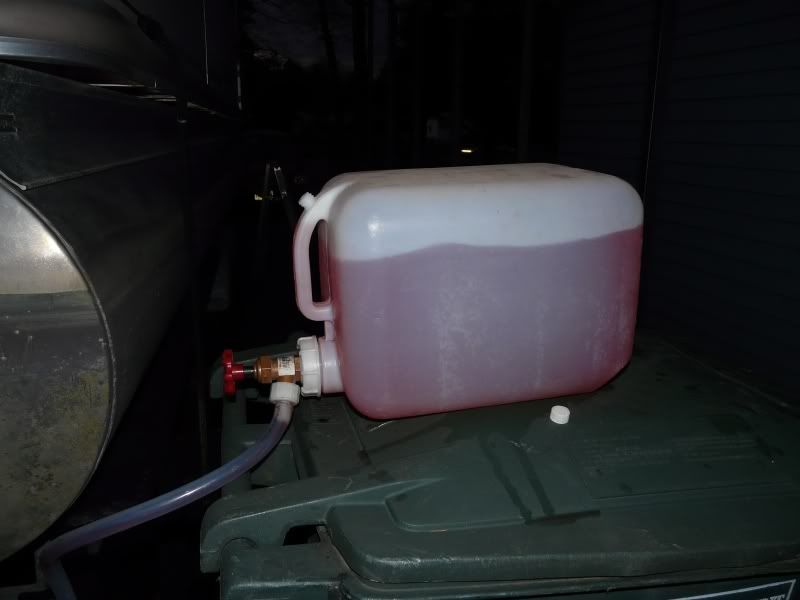
The reason for leaving some antifreeze in the tank is the next step, you have to start the motor:

4) While the engine is still warm, shut down the motor and remove the spark arrestor. Start up the engine and spray fogging oil into the carb until the engine stalls. Reinstall the spark arrestor.
Image

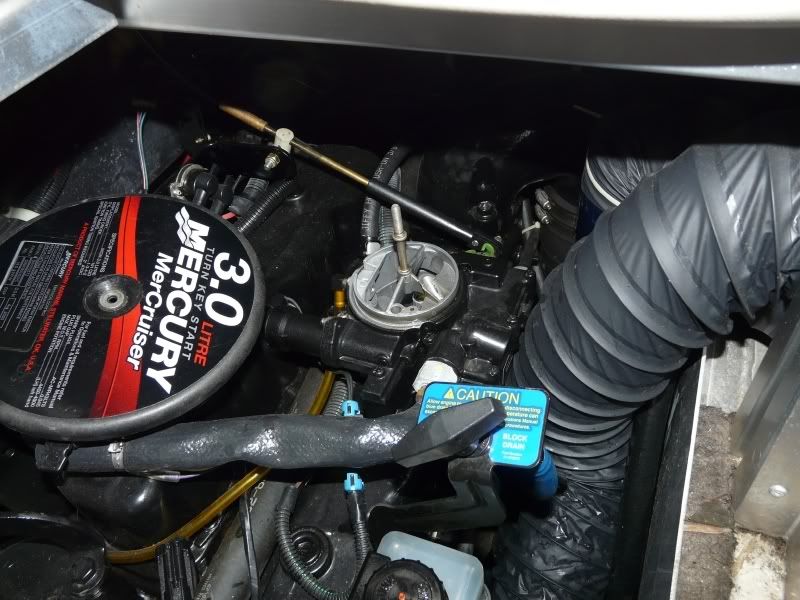
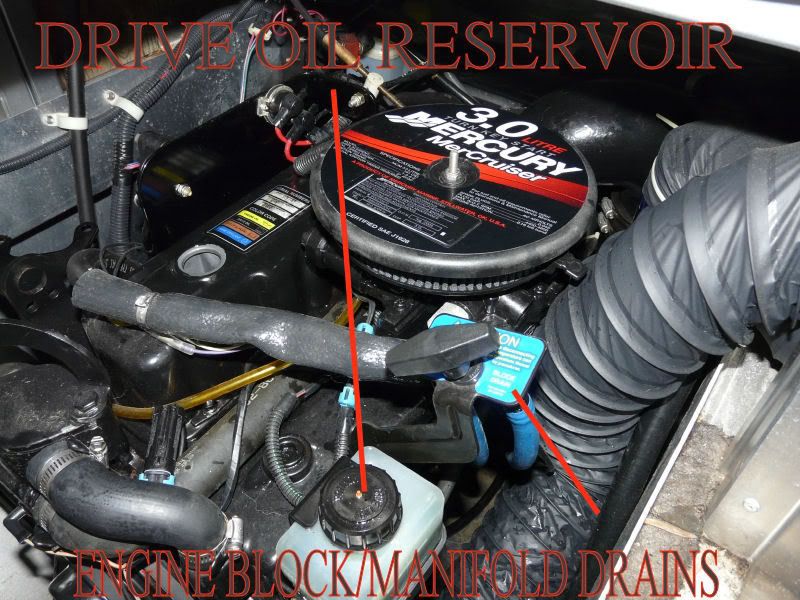
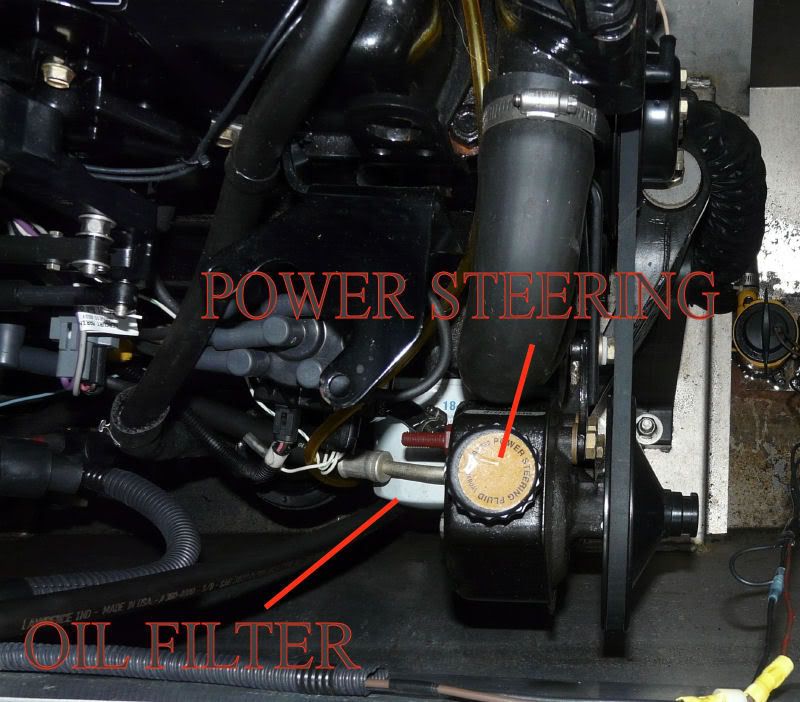
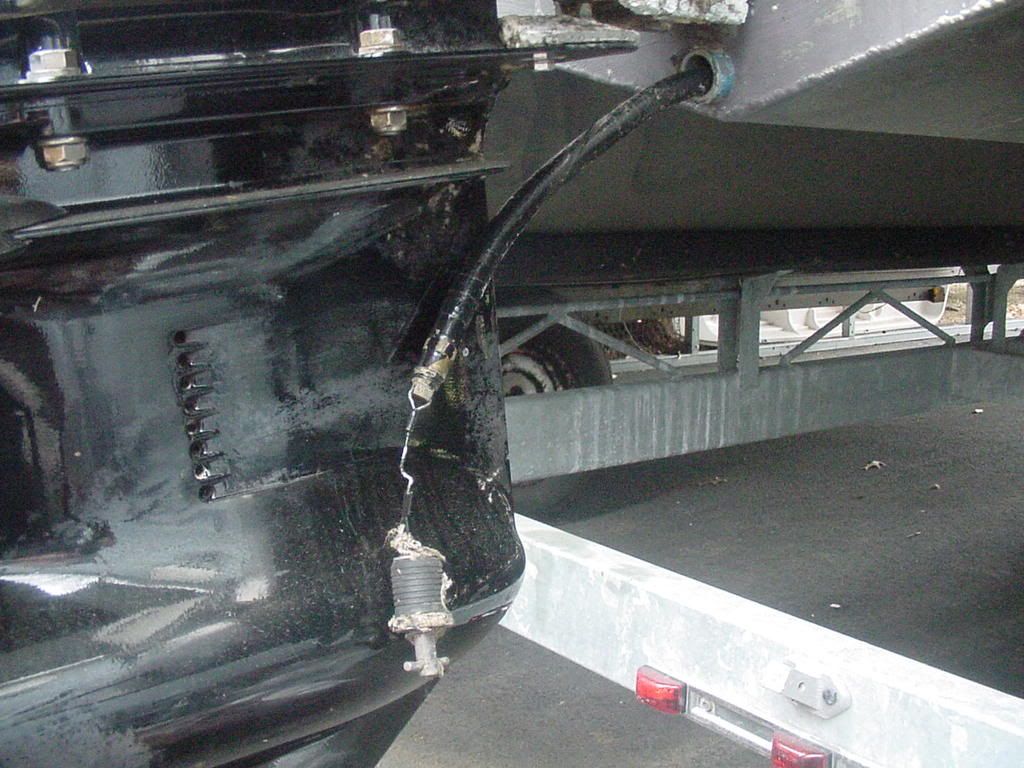
5) Drain the engine oil and change the oil filter. Mercruiser makes this a lot easier with it's remote oil drain. For some damn reason, Tracker doesn't tell you about this and they bury it. I attached it to my drain plug with a stainless tether.
Image

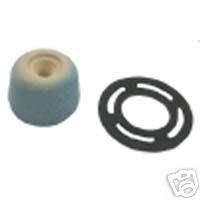
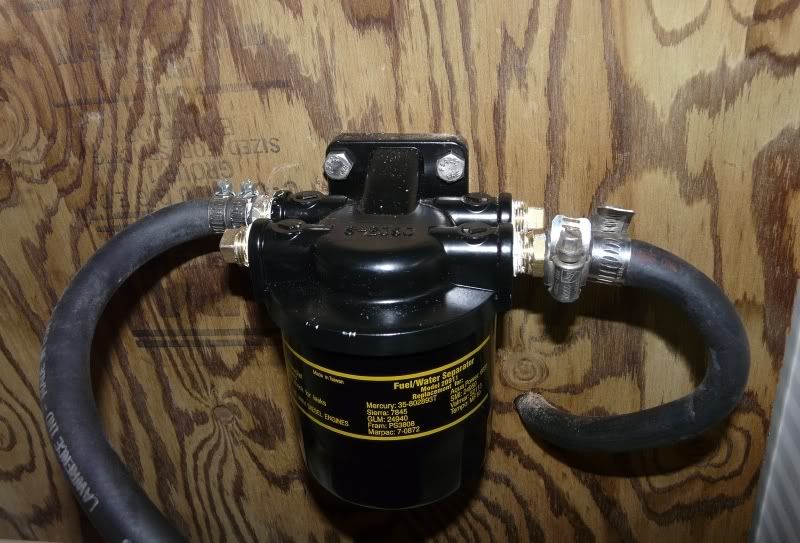
6) Change the water seperating fuel filter element (if equipped), Fuel pump bowl filter and carburetor inlet filter.

Water seperating fuel filter:
Image

Fuel inlet filter:
Image
Image

Fuel pump filter (impossible to get a pic due to the fact it's buried WAY down in the engine pod....very tough to get too.
Image
Image
Ed, Cheryl, Ethan and Aspen.
2013 Sun Tracker Party Barge 22 w/90 HP Mercury, "Hellrhighwater 2"
2014 E-350 Extended XLT.
Chesapeake City ,MD

User avatar
badmoonrising
Site Admin
Posts: 10066
Joined: Fri Mar 30, 2007 7:04 pm
Location: Chesapeake City, Maryland

Re: Winterization tutorial (I/O)

#2 Post by badmoonrising » Sat Nov 29, 2008 8:07 pm

7) Again, while the engine is still warm and preferably on a warm day (90w doesn't flow very well in cold temps), remove the lower drain (aka fill) plug and then the upper vent plug on the drive.

TIP: Make sure you use the correct size flat blade screwdriver or flat blade socket as these plugs strip VERY easily.

Replace both o-rings (sometimes called seals or gaskets) every time the plugs are removed. They are cheap and having one leak can cause a lot of damage due to water intrusion. Note the condition of the fluid, white or milky indicates water intrusion and you should have the drive serviced. Black/grey is dirty fluid. The lower plug is magnetic and will always have a little bit of metal flakes attached. If there's excessive metal flakes, have the drive serviced.
The adapter below makes adding the fluid easy. Capacity for an Alpha One Generation two drive is about 1 1/2 quarts. Attach the adapter to the gear oil container and the metal threaded end to the lower fill plug. Add enough fluid so that it flows (slighty) out of the upper vent plug. Replace the upper vent plug. Remove the adapter and replace the lower fill plug.
Image

Top off the drive oil reservoir:
Image

8 ) Inspect the drive's anodes and replace any that are 50 percent deteriorated. Alpha One Gen Two anodes are shown below:
Image


9) Grease all drive fittings. Don't forget the coupler fitting inside the engine pod it's VERY Tough to get too and you have to tap the starter key to rotate it into position.
Image

10) Check the condition of the drive bellows (shift cable, exhaust, and driveshaft) These usually last 5-7 years and could flood the engine pod on a pontoon boat if they leak. On a runabout, they can sink the vessel.

11) Check and add power steering and trim pump fluid if needed:
Image
Image

12) Remove the batteries, charge and store in a warm location. Charge once a month during winter lay up.
Ed, Cheryl, Ethan and Aspen.
2013 Sun Tracker Party Barge 22 w/90 HP Mercury, "Hellrhighwater 2"
2014 E-350 Extended XLT.
Chesapeake City ,MD

User avatar
badmoonrising
Site Admin
Posts: 10066
Joined: Fri Mar 30, 2007 7:04 pm
Location: Chesapeake City, Maryland

Re: Winterization tutorial (I/O)

#3 Post by badmoonrising » Sat Nov 29, 2008 8:27 pm

13) The Party Cruiser has 4 water tanks. (2 two supply tanks, and two holding tanks). I drain them all and add 1 gallon of RV pink antifreeze to each supply tank and 1/2 gallon down each holding tank.
Image

I open the water valve and lower the showerhead until antifreeze is present.

Image

One gallon down the sink to protect the galley holding tank, another gallon down the shower to protect it's holding tank.
Image

14) Next I remove all gear (lifejackets, beads :lol: ,anchors, ropes, fenders, etc. leaving every cabinet and storage area
empty. I then vacuum and clean each. Prop open all storage areas.

15) Next, I thoroughly clean all the windows, interior walls, shower/head, cabinet tops, fridge, stove, microwave, clean all the seats and apply 303.

16) Vacuum and steam clean all carpeted areas.

17) Remove and clean all canvass and the mooring cover.

18) Pressure wash the exterior (logs), remove any marine growth, and apply wax. I used Blue Coral this year and it worked well.

19) Allow everything drying time and reinstall the canvass and mooring cover.

20) Add Seafoam to the generator gas tank and change's it's oil.

21) I store the PC under my carport, so I don't shrinkwrap. All I need to do is lay a tarp over the bow to block blowing snow.

22) Before locking it up for the winter, I hang moisture absorbing packs (anti-mildew) in the cabin.

Can't wait until spring and recommissioning !
Ed, Cheryl, Ethan and Aspen.
2013 Sun Tracker Party Barge 22 w/90 HP Mercury, "Hellrhighwater 2"
2014 E-350 Extended XLT.
Chesapeake City ,MD

User avatar
badmoonrising
Site Admin
Posts: 10066
Joined: Fri Mar 30, 2007 7:04 pm
Location: Chesapeake City, Maryland

Re: Winterization tutorial (I/O)

#4 Post by badmoonrising » Sat Nov 29, 2008 8:34 pm

I usually touch up the bottom paint every season (need to completely repaint every 3-5 years), and polish the logs prior to spring launch.
Ed, Cheryl, Ethan and Aspen.
2013 Sun Tracker Party Barge 22 w/90 HP Mercury, "Hellrhighwater 2"
2014 E-350 Extended XLT.
Chesapeake City ,MD

User avatar
lakerunner
Site Moderator
Posts: 4820
Joined: Fri Mar 17, 2006 2:31 pm
Location: Live in McAlester, Ok Boat on Tenkiller
Contact:

Re: Winterization tutorial (I/O)

#5 Post by lakerunner » Sun Nov 30, 2008 5:13 pm

Great explanation Ed. Should help others new to MercCruiser engines.
Loyd & Betty Meeks
Livin the lake life
2004 Tracker 22 Regency/2010 90 E-Tec. Pulled by Ford 2020 F 250,
McAlester, Oklahoma
Home lake is Tenkiller

User avatar
WaltF
Posts: 4051
Joined: Thu Nov 06, 2008 8:42 am
Location: Colorado Springs, Co
Contact:

Re: Winterization tutorial (I/O)

#6 Post by WaltF » Mon Dec 01, 2008 9:55 am

Sweet!! Great job BMR!
These kind of threads make the site VERY useful!
--------------------
ImageImageImage
--------------------
'07 22 ft SunTracker Regency 135hp i/o
'02 Dodge 2500, Edge Juice w/Attitude
Colorado Springs, CO.

User avatar
Parasympathetic
Posts: 1785
Joined: Mon Nov 19, 2007 4:48 pm
Location: Missouri

Re: Winterization tutorial (I/O)

#7 Post by Parasympathetic » Fri Dec 19, 2008 6:16 am

Thanks Ed.
Image

2015 Ranger RT175
Yamaha 70hp
Lake Wappapello, MO

IF WE MAKE GUNS ILLEGAL, THEN NOBODY WILL GET SHOT ANYMORE. THAT'S HOW WE STOPPED EVERYBODY FROM DOING DRUGS.

User avatar
badmoonrising
Site Admin
Posts: 10066
Joined: Fri Mar 30, 2007 7:04 pm
Location: Chesapeake City, Maryland

Re: Winterization tutorial (I/O)

#8 Post by badmoonrising » Fri Dec 19, 2008 9:13 am

Hey Para, I never heard what the diagnosis was on your 3.0 (thanks to Brady) How'd it go ?
Ed, Cheryl, Ethan and Aspen.
2013 Sun Tracker Party Barge 22 w/90 HP Mercury, "Hellrhighwater 2"
2014 E-350 Extended XLT.
Chesapeake City ,MD

User avatar
HandymanHerb
Site Admin
Posts: 14336
Joined: Fri Mar 17, 2006 8:57 pm
Location: Orlando Fla

Re: Winterization tutorial (I/O)

#9 Post by HandymanHerb » Fri Dec 19, 2008 9:49 am

Good job Ed, Education is always good and building our maintenance data base here helps everyone :bowdown :bowdown :bowdown
In Memory of John 6x6 Larsen

Image

User avatar
Parasympathetic
Posts: 1785
Joined: Mon Nov 19, 2007 4:48 pm
Location: Missouri

Re: Winterization tutorial (I/O)

#10 Post by Parasympathetic » Mon Dec 22, 2008 9:36 pm

badmoonrising wrote:Hey Para, I never heard what the diagnosis was on your 3.0 (thanks to Brady) How'd it go ?
Haven't heard anything yet. Will probably call tomorrow and see what's up.
Image

2015 Ranger RT175
Yamaha 70hp
Lake Wappapello, MO

IF WE MAKE GUNS ILLEGAL, THEN NOBODY WILL GET SHOT ANYMORE. THAT'S HOW WE STOPPED EVERYBODY FROM DOING DRUGS.

User avatar
chill'nthemost
Posts: 1447
Joined: Sat Jun 12, 2010 9:25 pm
Location: Terrebonne,OR

Re: Winterization tutorial (I/O)

#11 Post by chill'nthemost » Sun Oct 14, 2012 4:50 pm

I know it's an old thread but I just made this out of a square plastic bucket I had. Drilled a 1/2'' hole in the bottom and bought about $10 of fittings including the ball valve using garden hose washers on each side. I already had the clear 5/8 hose. The bucket fit tight under a bracket like it was meant to be there.
Attachments
toon rv.JPG
toon rv.JPG (238.69 KiB) Viewed 7497 times
1998 Sun Tracker Party Barge 25ft, stern drive 3.0 Chevy
Unfortunate member Parent's of Murdered Children

I love my country, it's the government I fear

User avatar
tuned
Posts: 1259
Joined: Wed May 26, 2010 11:40 pm

Re: Winterization tutorial (I/O)

#12 Post by tuned » Mon Oct 15, 2012 5:03 am

Great info here, Ed!

I just got done writing up and completing my own winterization procedures. Yep, actually started that beast for the first time today and finished winterization. Did a lot of reading for this, although having previously owned a 454 of almost the same year helped. I just installed one o them fancy new oil drain setups that you mentioned and am sure I will LOVE IT!

With a few differences, my steps are VERY similar. Here are a few notes to compare with:

1. Unsure about fuel pump filter and fuel bowl filter. I’ll have to look into that. I changed my water separating fuel filter only.

2. I do a couple of extra steps on the actual freeze protection (-40F winters here). I open all drains and rod out/or flush in order to remove as much water as possible (along with sediment) prior to injecting antifreeze. Mercruiser STRONGLY recommends antifreeze that has corrosion protection. The RV antifreeze does not usually have this component. I do use the pink RV stuff anyway because it is harmless to the environment when you drain it or run it out. Plus it is a lot cheaper. In order to satisfy the corrosion protection, I dope the pink stuff with boiler treatment chemical (I am a boiler operator). The cheapest stuff on the consumer market is used for outdoor wood boilers. It doesn’t take very much. Recommend you consider this step Ed.

3. I refuse to use motor muffs. They just piss me off (I have a pair of good ones too). Instead, I pull the water intake line off the inside of the transom and have a special fitting for it. I then inject water or antifreeze directly into the Seawater Pickup Pump (engine mounted on 454Bravos).

4. I leave batteries on board and hooked up. I then just plug a ‘smart charger’ into them and walk away. I can’t say enough about smart chargers. My batteries seem to last twice as long when I use them. I have a whole fleet of them for anything that doesn’t get run for a month or longer (boats, sled, wheelie, plow truck, Bobcat)

5. I/Os and outboards alike, I change my water pump impellor religiously every 3 years. Anything over 5 and I believe that you are just begging for disaster.

A few other minor differences, but nothing major. I just installed a half-closed cooling system etc…which changes the game a bunch in that area, but this is not common in most boats.

Oh, aaand I leave the beads on board (along with the coconut bra and the boat monkey). :smoke
ToddBob
'Al the Mirthmaker' (The Third)
Build-- viewtopic.php?f=16&t=14007
Rainy Lake/Voyageurs National Park
International Falls, MN

User avatar
Thin Ice
Posts: 431
Joined: Sun Jan 09, 2011 9:50 am
Location: Vandergrift, PA

Re: Winterization tutorial (I/O)

#13 Post by Thin Ice » Mon Oct 15, 2012 7:58 am

Great job Ed.

Even I can follow those steps!
2009 Suntracker Regency Party Barge 22
2011 Evinrude E-Tec 115 HO
Full Enclosure
Kiskiminetas and Allegheny Rivers

User avatar
playcat
Posts: 1535
Joined: Tue Apr 05, 2011 1:06 pm

Re: Winterization tutorial (I/O)

#14 Post by playcat » Mon Oct 15, 2012 8:37 am

As much as I liked the bucket mods, I liked the antifreeze setup BMR used...where can I get one?
playcat
JC 266 TriToon
Kerr Reservoir, VA

User avatar
tuned
Posts: 1259
Joined: Wed May 26, 2010 11:40 pm

Re: Winterization tutorial (I/O)

#15 Post by tuned » Mon Oct 15, 2012 12:32 pm

playcat wrote:As much as I liked the bucket mods, I liked the antifreeze setup BMR used...where can I get one?
I use one also. They work great.
http://www.westmarine.com/webapp/wcs/st ... sNum=50297
ToddBob
'Al the Mirthmaker' (The Third)
Build-- viewtopic.php?f=16&t=14007
Rainy Lake/Voyageurs National Park
International Falls, MN

Post Reply